Recently, I got an assignment for my employer's internal project to investigate Elasticsearch and its usage from within ASP.NET Core 2.1 app. I had no prior knowledge of Elasticsearch, but I had some experience with Solr and earlier with NHibernate Search which also used Lucene under the cover. This post is a summary of my research.
So, what exactly is Elasticsearch?

Elasticsearch is a distributed, RESTful search and analytics engine. It's based on Lucene and provides a JSON based REST API on top of it, among other things. It also has a rich ecosystem of tools and a number of official and unofficial client libraries. There are two official .NET clients, a low-level Elasticsearch.Net which is just an unopinionated wrapper around REST API and a high-level NEST library built on top of Elasticsearch.Net which provides strongly typed, fluent query DSL.
Elasticsearch installation
Almost all of my development work is done on Windows and for it, we have several installation options, including a simple .zip file package, an .msi installation package and of course docker images.
If you are going with .zip or .msi package, you'll also need to install Java 8 SDK or later. Once unpacked or installed, you can run Elasticsearch from the command line or install it as a Windows service. Since I don't have Java SDK installed but have Docker, I'm going with Docker image option.
Elastic, the company behind the Elasticsearch, is hosting their own Docker registry. To pull the latest Elasticsearch image (version 6.3.0 at the moment of writing) from the registry, you need to execute this command:
> docker pull docker.elastic.co/elasticsearch/elasticsearch:6.3.0
Kibana is also interesting for playing around with Elasticsearch. It's a web GUI that lets you visualize Elasticsearch data and navigate through the whole Elastic Stack. To pull its image, execute this command:
> docker pull docker.elastic.co/kibana/kibana:6.3.0
Now that we have both Elasticsearch and Kibana downloaded, we can run them under the same network. First, let's create a Docker network:
> docker network create esnetwork --driver=bridge
With the network set up, run both Elasticsearch and Kibana containers:
> docker run -p 9200:9200 -p 9300:9300 -e "discovery.type=single-node" --name elasticsearch -d --network esnetwork docker.elastic.co/elasticsearch/elasticsearch:6.3.0
> docker run -p 5601:5601 --name kibana -d --network esnetwork docker.elastic.co/kibana/kibana:6.3.0
We also need to map a volume to avoid the data being reset each time we restart the container, which further complicates the command. Instead of that, we can use docker-compose. Let's create docker-compose.yml file with the following content:
version: '2'
services:
    elasticsearch:
        image: docker.elastic.co/elasticsearch/elasticsearch:6.3.0
        ports:
            - "9200:9200"
            - "9300:9300"
        volumes:
            - esdata:/usr/share/elasticsearch/data
        networks:
            - esnetwork
    kibana:
        image: docker.elastic.co/kibana/kibana:6.3.0
        ports:
            - "5601:5601"
        networks:
            - esnetwork
        depends_on:
            - elasticsearch
volumes:
    esdata:
        driver: local
networks:
    esnetwork:
        driver: bridge
So, in short, we create two services elasticsearch and kibana and connect them via bridge network. kibana depends on elasticsearch in order to prevent it from being started first. If elasticsearch container start fails, kibana will fail too. We are also using the default ports for both.
To run everything, we can just do:
> docker-compose up
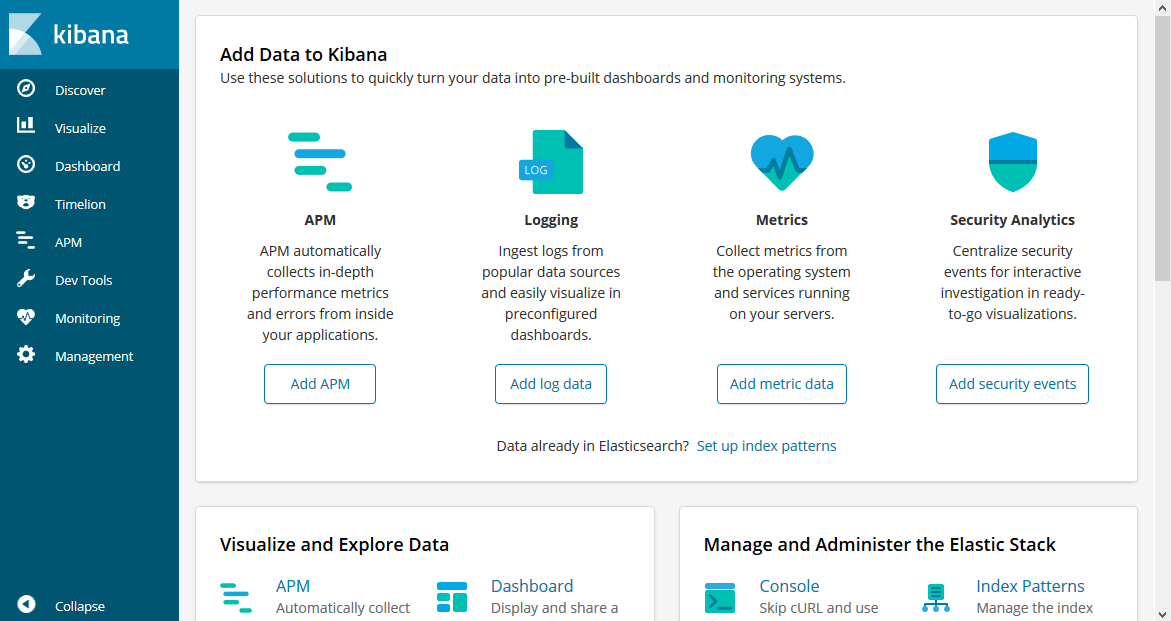
Now both Elasticsearch and Kibana are started. Browse http://localhost:5601/ to be greeted with Kibana dashboard.
That's everything we need for running Elasticsearch in dev environment. Installation on production environment shouldn't be too hard either as there are packages for various Linux distros. Also, there are Elasticsearch SaaS offerings from all major cloud vendors and from Elastic itself.
Sample project creation
To see how Elasticsearch works with ASP.NET Core, we'll create a new blog project, using Mads Kristensen's MiniBlog.Core template. MiniBlog is a simple blogging engine built on ASP.NET Core 2.0.
If you don't want to follow the step-by-step creation of the new project and adding functionality to it, there's a complete sample on GitHub.
On the command line, install the template:
> dotnet new --install MadsKristensen.AspNetCore.Miniblog
Then create the project and add the NEST NuGet package:
> dotnet new miniblog --name MiniBlogElasticsearch
> dotnet add package NEST
Open the project with Visual Studio Code or with Visual Studio 2017:
> code .
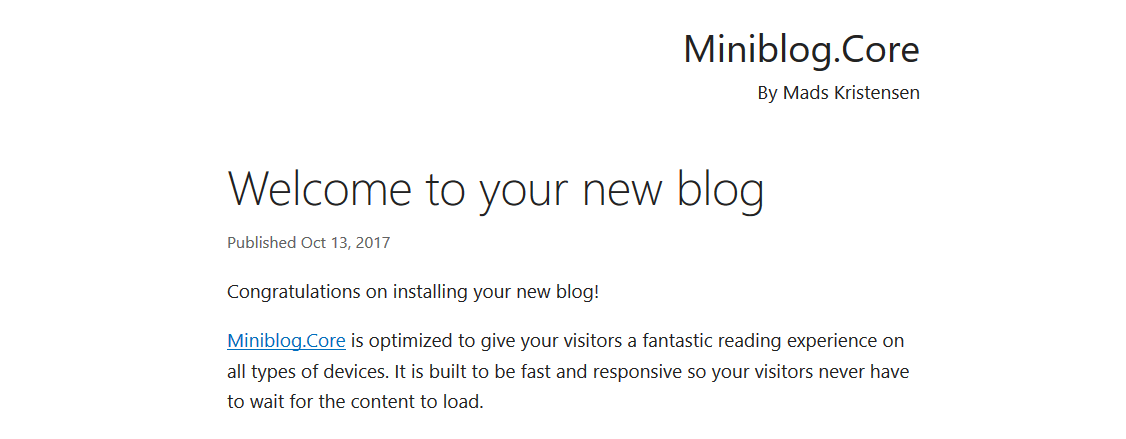
If you start the debugging now or do dotnet run from the command line, you should get the following welcome post in your browser:
You can log in (using Sign in link at the bottom of the page) and create new posts - we will need several in order to test how search is working. Use demo for both username and password.
Configuring Elasticsearch client
NEST NuGet package is already installed in the previous step. NEST is a high level .NET client for Elasticsearch which provides a way to call Elasticsearch REST APIs via strongly-typed, easy to use, query DSL. There's a good Getting started document on Elastic search documentation which can bring you up to speed.
For connecting to Elasticsearch API, we will use ElasticClient which needs to be configured first. The documentation states that ElasticClient is thread safe and hence it's possible to use a singleton instance of it per application (or per index). In order to be good ASP.NET Core citizens, let's initialize everything we need for Elasticsearch in Startup class' ConfigureServices method. Of course, we'll follow the best practices and add extension method for it:
// In Startup class
public void ConfigureServices(IServiceCollection services)
{
    // ...
    services.AddElasticsearch(Configuration);
}
And here's the basic extension method implementation:
public static class ElasticsearchExtensions
{
    public static void AddElasticsearch(
        this IServiceCollection services, IConfiguration configuration)
    {
        var url = configuration["elasticsearch:url"];
        var defaultIndex = configuration["elasticsearch:index"];

        var settings = new ConnectionSettings(new Uri(url))
            .DefaultIndex(defaultIndex)
            .DefaultMappingFor<Post>(m => m
                .Ignore(p => p.IsPublished)
                .PropertyName(p => p.ID, "id")
            )
            .DefaultMappingFor<Comment>(m => m
                .Ignore(c => c.Email)
                .Ignore(c => c.IsAdmin)
                .PropertyName(c => c.ID, "id")
            );

        var client = new ElasticClient(settings);

        services.AddSingleton<IElasticClient>(client);
    }
}
The method expects that there is an elasticsearch section in the configuration, so we need to add it to appsettings.json (or other configuration source):
{
    "elasticsearch": {
        "index": "miniblog",
        "url": "http://localhost:9200/"
    }
}
index should point to the default index in Elasticsearch and url to the actual address of our Elasticsearch instance. Note that the organization within Elasticsearch is a bit different than within relational database server. When I first looked into it, I thought that index is an equivalent of a single database and type an equivalent of a database table. However, it's not really like that. Types are now obsolete from version 6.0.0 and will be completely removed in version 7.0.0. Indices should contain a single type only. Fortunately, we only have one type that needs to be indexed and searched - a blog Post. Comment type is nested and indexed under Post.
From the docs: Indices created in Elasticsearch 6.0.0 or later may only contain a single mapping type. Indices created in 5.x with multiple mapping types will continue to function as before in Elasticsearch 6.x. Mapping types will be completely removed in Elasticsearch 7.0.0.
OK, back to AddElasticsearch extension method. It also creates default mappings for our types. We are choosing not to index Post.IsPublished, Comment.Email (GDPR everyone?) and Comment.IsAdmin properties. Plus, we want to have better names for ID properties in index - id instead of iD.
Once ConnectionSettings are defined, we create a new instance of ElasticClient using those settings and register it as a singleton under .NET Core dependency injection container.
Indexing blog posts
Great, we can now use IElasticClient when we need to communicate with Elasticsearch instance. Let's use it to add posts to the index whenever they are saved.
Open Services/FileBlogService.cs in your editor and locate SavePost(Post post) method. MiniBlog saves all the blog posts as separate XML files under wwwroot/Posts folder and SavePost method does the actual saving. We'll modify it by adding some code at the beginning and at the end of the method:
// Inject IElasticClient to the constructor

public async Task SavePost(Post post)
{
    string filePath = GetFilePath(post);
    post.LastModified = DateTime.UtcNow;

    // Add this line:
    bool postExists = File.Exists(filePath);

    // ... rest of the method functionality

    // Add these lines at the end:
    if (postExists)
        await _elasticClient.UpdateAsync<Post>(post, u => u.Doc(post));
    else
        await _elasticClient.IndexDocumentAsync(post);
}
In order to index the blog Post we check if the post already exists. If it does, we assume it's already a part of the index, so we do UpdateAsync. Elasticsearch will identify the post by id. If it doesn't already exist, it will call IndexDocumentAsync.
Blog Posts can also be deleted. We need to modify DeletePost(Post post) method too:
public async Task DeletePost(Post post)
{
    string filePath = GetFilePath(post);

    if (File.Exists(filePath))
        File.Delete(filePath);

    await _elasticClient.DeleteAsync<Post>(post);

    if (_cache.Contains(post))
        _cache.Remove(post);
}
It's possible that index sometimes gets out of sync with actual posts - like when we are adding posts without starting Elasticsearch first, or if we have created posts before implementing the indexing changes above. To cover these cases, we'll create a simple reindex operation (NOT for production use). We can have it under the new SearchController:
public class SearchController : Controller
{
    private readonly IBlogService _blogService;
    private readonly IElasticClient _elasticClient;
    private readonly IOptionsSnapshot<BlogSettings> _settings;

    public SearchController(IBlogService blogService, IElasticClient elasticClient, IOptionsSnapshot<BlogSettings> settings)
    {
        _blogService = blogService;
        _elasticClient = elasticClient;
        _settings = settings;
    }

    [Authorize]
    [Route("/search/reindex")]
    public async Task<IActionResult> ReIndex()
    {
        await _elasticClient.DeleteByQueryAsync<Post>(q => q.MatchAll());

        var allPosts = (await _blogService.GetPosts(int.MaxValue)).ToArray();

        foreach (var post in allPosts)
        {
            await _elasticClient.IndexDocumentAsync(post);
        }

        return Ok($"{allPosts.Length} post(s) reindexed");
    }
}
The implementation is pretty naïve (like I said, NOT for production use). It deletes all posts from the index using match_all operator of Elasticsearch and then recreates the index by adding all posts to the index one by one. There's a better way to do this for production - Reindex API but our implementation is good enough for a simple demo.
When we navigate to http://localhost:[our-port]/search/reindex in the browser, it will trigger reindexing and display the number of indexed posts.
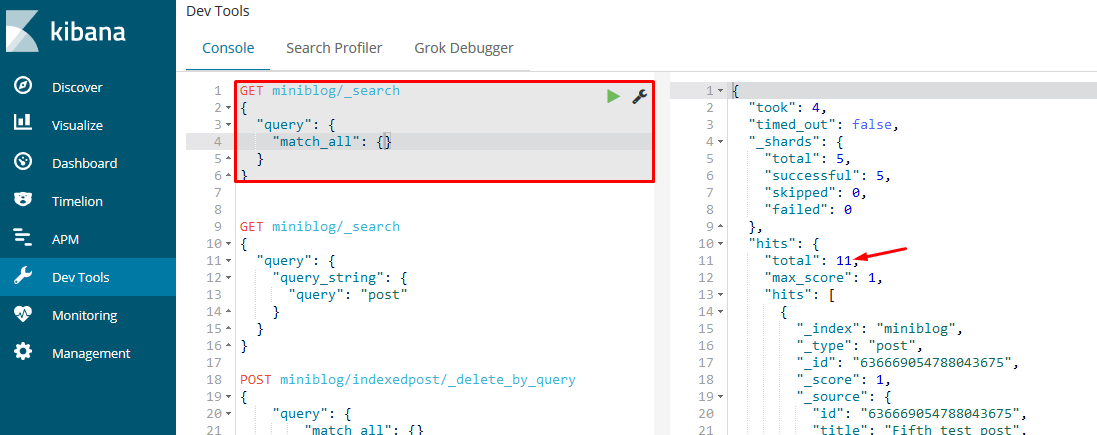
That's it! Our Elasticsearch index now has data we can use. Let's try to see it in Kibana. Navigate to http://localhost:5601/app/kibana#/dev_tools/console and enter the following in the console:
GET miniblog/_search
{
    "query": { "match_all": {} }
}
It will use the match_all operator to return everything in our miniblog index. Depending on the number of posts you have added you might have a different total number:
Implementing search operation
Excellent! We have data indexed but we're not using it for anything from the application itself. Let's add search operation next. Add the following to our SearchController:
[Route("/search")]
public async Task<IActionResult> Find(string query, int page = 1, int pageSize = 5)
{
    var response = await _elasticClient.SearchAsync<Post>(
        s => s.Query(q => q.QueryString(d => d.Query(query)))
            .From((page - 1) * pageSize)
            .Size(pageSize));

    ViewData["Title"] = _settings.Value.Name + " - Search Results";
    ViewData["Description"] = _settings.Value.Description;

    if (!response.IsValid)
    {
        // We could handle errors here by checking response.OriginalException or response.ServerError properties
        return View("Results", new Post[] { });
    }

    if (page > 1)
        ViewData["prev"] = GetSearchUrl(query, page - 1, pageSize);
    if (response.IsValid && response.Total > page * pageSize)
        ViewData["next"] = GetSearchUrl(query, page + 1, pageSize);

    return View("Results", response.Documents);
}

private static string GetSearchUrl(string query, int page, int pageSize)
{
    return $"/search?query={Uri.EscapeDataString(query ?? "")}&page={page}&pagesize={pageSize}/";
}
It's pretty simple. QueryString full text query is used for searching for the string passed in from the browser. QueryString searches in all fields by default and that's what we need. A pagination is also implemented with page and pageSize parameters, used as arguments for From and Size methods of NEST fluent DSL.
Tip: Errors are not handled. By default, NEST doesn't throw exceptions, neither for search nor for indexing operations. We can change that when configuring the client. When exceptions aren't thrown, you can check the response object. response.IsValid will be false in case of any error and response.ServerErrors or response.OriginalException would contain actual errors or exceptions. We could for instance check which error happens and send it to the view to display it to the user.
The backend is implemented. We now need to add a search form to our pages. We'll add it below the header in _Layout.cshtml:
<header class="siteheader">
    <div class="container">
        <p itemprop="name"><a href="~/">@settings.Value.Name</a></p>
        By <span itemprop="author">@settings.Value.Owner</span>
    </div>
    <!-- Insert search form here: -->
    <form class="container" asp-action="Find" asp-controller="Search" method="get">
        <input type="search" name="query" placeholder="Search..." value="@ViewContext.HttpContext.Request.Query["query"]" />
    </form>
</header>
When user enters a value in search input and hits Enter, it will trigger the search operation and redirect the browser to search results. As a last thing, let's add Views/Search/Results.cshtml Razor view:
@model IEnumerable<Post>
<div class="container search-results">
<h1>Search results</h1>
@if (!Model.Any())
{
<p>Nothing found for: <em>@ViewContext.HttpContext.Request.Query["query"]</em></p>
}
@foreach (var post in Model)
{
<article class="post">
<header>
<h2><a asp-controller="Blog" asp-action="Post" asp-route-slug="@post.Slug">@post.Title</a></h2>
<time datetime="@post.PubDate.ToString("s")" itemprop="datePublished">Published @post.PubDate.ToString("MMM d, yyyy")</time>
@if (User.Identity.IsAuthenticated)
{
<a asp-controller="Blog" asp-action="edit" asp-route-id="@post.ID" title="Edit the post">Edit post</a>
}
</header>
<p>@post.Excerpt</p>
</article>
}
<nav class="pagination" aria-label="Pagination">
@if (ViewData["prev"] != null)
{
<a rel="prev" href="@ViewData["prev"]" title="Previous results">« Previous</a>
}
@if (ViewData["next"] != null)
{
<a rel="next" href="@ViewData["next"]" title="Next results">Next »</a>
}
<br /><br />
@section Head {
@if (ViewData["prev"] != null)
{
<link rel="prev" href="@ViewData["prev"]" />
}
@if (ViewData["next"] != null)
{
<link rel="next" href="@ViewData["next"]" />
}
}
</nav>
</div>
Search page displays a list of Posts found by Elasticsearch in response to the given query.
If we search for something on our site, this is what we will get:
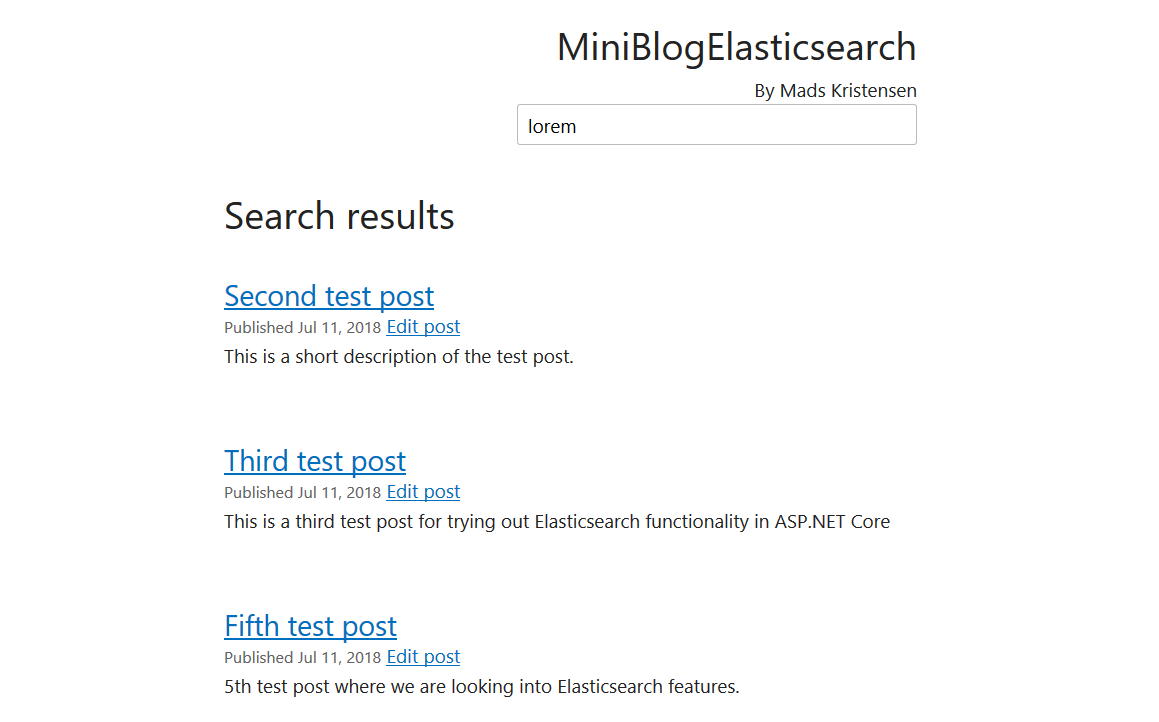
Pagination will work too if you have more than 5 results.
Summary
This is just a tip of the iceberg. Elasticsearch has a vast number of features that you can use. The sample application on GitHub implements a few more features like boosting, custom analyzers, tokenization, character filters, etc. You can find that in ElasticsearchExtensions.cs file.
A thing to keep in mind is - make sure you double check everything before going into production.
First of all, you don't want Elasticsearch or Kibana's port exposed publicly! It should be accessible from your app backed only. It can (and should) also be protected with authentication. Check out X-Pack Authenticate API and SSL Certificate API for that.
Second, don't just throw everything into the index. Pick up only the data that makes sense. Adding a bunch of data just for the sake of having them indexed will hurt the performance, but more importantly, you'll get into trouble when you need to delete something. Remember GDPR? User data should be kept out of the index unless it's absolutely necessary. The other security-critical information too. Data breaches happen all the time. Don't be a part of the statistics.
So, what's my final thought on Elasticsearch? It's an excellent and powerful tool and it fulfilled my expectations.
However, what I didn't expect is the quality of the documentation. It's fantastic! There's an API reference, getting started documentation, best practices, an excellent documentation for the clients, etc. And not just the documentation for Elasticsearch, but for Docker and ASP.NET Core too. Long gone are the days where we had dry MSDN documentation with unoptimized and often wrong samples written by technical writers and not by developers.
Getting started with something as complex as Elasticsearch these days is easy thanks to an excellent documentation, so kudos to people from Elastic and community for writing them! All the Elasticsearch docs are editable on GitHub. Kudos also go to Docker and ASP.NET Core documentation that's also available for editing on GitHub. This is truly a documentation renaissance.
comments powered by Disqus